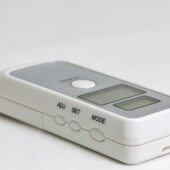
Home blood glucose meters (glucometers) are designed to be super easy to use while delivering highly accurate results.
Following the right steps when measuring your blood glucose level is essential in obtaining accurate results. This includes using the right amount of blood, using the test strip properly, and preparing your finger for testing.
This guide explains how to use a blood glucose meter and answers frequently asked questions on the use of glucometers.
How To Measure Your Blood Glucose With A Glucometer
1. Wash your hands with soap and water
Only use a glucometer with clean hands. This not only reduces the risk of contaminating the blood sample and messing up the results, it also protects you from infection when you prick your finger.
Even if you’ll swab your finger with alcohol, you still need to wash your hands with soap and water.
2. Prepare the kit
Gather everything you need for the test on a clean surface like a table. Don’t start looking for the strips when you’ve already pricked your finger.
Here’s everything you need.
- A glucometer.
- Testing strips.
- Lancing device and lancets.
- 70% alcohol and cotton swab
- A notebook or diary (not necessary if your glucometer has a recording option)
3. Collect a blood sample
Take one of the strips and insert it the right way into the blood glucose meter. Most glucometers automatically come one when you insert the strip.
Next, load the lancing device with the lancet. Some lancing devices have multiple settings that vary how deep of a puncture the lancet makes.
If you have thick skin, set the lancet to go deeper.
Swab your finger (any finger) with 70% alcohol to sterilise the puncture area. If you’ve thoroughly washed your hands with soap and water, you don’t have to sterilise your ginger.
Use the lancing device, prick the side of your finger. That’s where it’ll be least painful.
Apply a drop of blood onto the testing strip that you’ve already inserted into the glucometer. Hold a cotton swab over the puncture as you wait for the results. This will stop further bleeding.
4. Read the results
Most glucometers display results just a few seconds after you’ve collected a blood sample onto the test strip. Yours might have a handy countdown.
The glucometer will display results either in mg/dl or mmol/L. The standard fasting glucose level in healthy adults is 3.9 to 5.5 mmol/L (70 to 100 mg/dl).
For after meal tests, the recommendation is to stay under 10 mmol/L or 180 mg/dl.
If you are diabetic, you should have target blood glucose levels from your doctor for different times of the day. Compare the readings you get to what the doctor recommends.
5. Record your results
When recording the glucose reading, note the time of day and whether it’s before or after a meal.
To make recording easier, get a blood glucose or diabetic diary. A diabetic diary will have entries for each day of the week as well as multiple entries for each day so you can record several measurements in a day.
There are also apps specifically for recording blood glucose readings. Apps are great because they also analyse the data for you and can make charts to show you how your blood glucose level has been trending.
Some glucometers also have the option of recording a number of readings. Some will even let you specify what kind of measurement it is (fasting, after a meal, etc.).
The bottom line is, record each blood glucose measurement. It’ll be useful both for you and your doctor.
6. Put everything away
Put everything back into its place, ideally a pouch. Remember to keep the glucometer and the entire kit well away from where kids can reach.
Remove the lancet from the lancing device and dispose of it safely.
How Often Do I Need To Measure Blood Glucose?
It depends on the type of diabetes you have, the medications you are on, and your lifestyle. To get a testing schedule that’s suitable for you, talk to your doctor.
But generally, people with type 1 diabetes need to test more often – in some cases up to 10 times a day – to make sure their blood sugar remains stable.
Your doctor will recommend testing first thing in the morning, after meals, before and after a workout, before you sleep, in the middle of the night and so on.
In some situations, the doctor may recommend a continuous monitoring device that measures blood sugar every few minutes.
For type 2 diabetes, how often you test blood sugar depends on how well you are managing it. If your blood sugar has stabilised and you are aware what sets it off, you can test just once a day.
If you are on insulin medication, your doctor may recommend testing your blood sugar multiple times a day.
Should I Use The First or Second Drop Of Blood When Testing Blood Glucose?
You may have heard that you should wipe away the first drop of blood after you prick your skin, and use the second drop.
For most people, this is not necessary.
If you’ve thoroughly washed your hands with soap and water, studies indicate that the first drop provides accurate results.
Using the second drop is recommended in situations where there isn’t access to clean water and soap. If hands are dirty, wipe away the first drop and use the second drop to ensure test accuracy.
However, if your hands contain any sugars (e.g. you’ve just eaten a piece of cake or fruit) it’s best to wash your hands. Sugar on fingers can significantly affect results of a glucometer test.
How To Calibrate/Code A Blood Glucose Meter
If you have a no-code glucometer, you do not have to worry about calibration or coding. The meter will do it automatically when you insert a test strip.
If your glucometer requires manual coding, you have to calibrate it every time you open a new pot of strips.
It’s an easy process. When you insert a strip, the display will indicate a code. If it does not match the code on the tin holding the strips, adjust it until it matches.
Coding a glucometer calibrates it to work with those specific strips, ensuring testing accuracy.
What Is a Control Solution And How Do I Use It?
Your glucometer kit might have come with a bottle labelled ‘control solution’. This is for checking the accuracy of the glucometer. It does not calibrate the glucometer; it just lets you check if it’s still measuring accurately and that the test strips are in good condition.
The control solution has a specific level of glucose that the meter tests against.
Follow the instructions in your user manual for using the control solution (it’s different in each glucometer brand).
If the accuracy test results in an error or out of range readings, you’ll need to figure out if the problem is the glucometer or the test strips. Contact the manufacturer for guidance.
Additional Tips For Using a Blood Glucose Meter
- After pricking your finger, hang your arm down and let the blood flow out on its own. If you have to squeeze your finger to get a drop of blood, do it gently and stay well away from the puncture. If you are struggling to get blood, prick another spot and use a deeper setting on the lancing device.
- When collecting a blood sample, only the blood should touch the tip of the strip. Do not let the strip touch your skin as any residue dirt or food could contaminate the sample.
- Once you remove a single strips from the container, close it immediately to avoid contaminating the other strips with moisture or dirt.
- Store the glucometer, strips, lancets and lancing device in a pouch that you can easily travel with. This makes it easy to take a blood glucose test at any time wherever you are.
- Store the strips properly in a cool and dry environment. Too much heat or cold as well as exposure to moisture can damage them.
- Do not use strips that are beyond their expiry date. They may not provide reliable results.
- Set a testing routine. Test your blood glucose at the same time everyday. This will let you see a pattern. For example, you might notice that your blood sugar gets too high after a certain meal. By adjusting what you eat for that meal, you can track how blood sugar level changes.


